How a Payment Works
A complete walkthrough of how a crypto payment works from checkout to order completion.
This guide walks through a complete payment from the customer placing an order to the funds arriving in your wallet. Understanding the flow helps you configure AshePay correctly and troubleshoot issues if they come up.
Step 1 - Customer selects "Pay with Crypto" at checkout
AshePay adds a payment option to your WooCommerce checkout alongside your existing methods (card, PayPal, etc.). The customer selects it and sees the available chains and tokens.
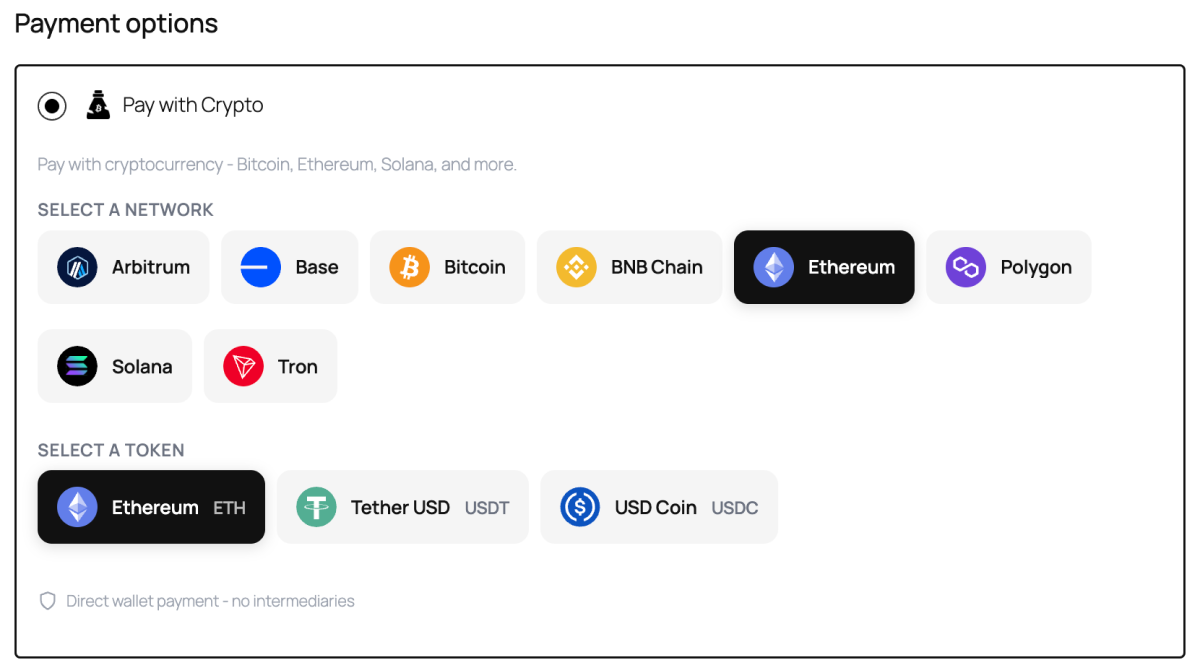
On the free version, customers see Ethereum (ETH) and Bitcoin (BTC) — whichever chains you have enabled and configured with a wallet address. On Pro, all 8 chains and their stablecoins (USDT, USDC) are shown, and the customer picks their preferred network.
The exact crypto amount is calculated in real time using live Binance prices. A unique small decimal offset is added (e.g. 0.033827 ETH instead of 0.03380) so that if two customers pay to the same wallet at the same time, each payment is still uniquely matched to the correct order.
Step 2 - Order is placed and the customer gets a "Pay Now" email
When the customer clicks "Place Order," WooCommerce creates the order with status On-Hold and AshePay immediately sends a payment instructions email.
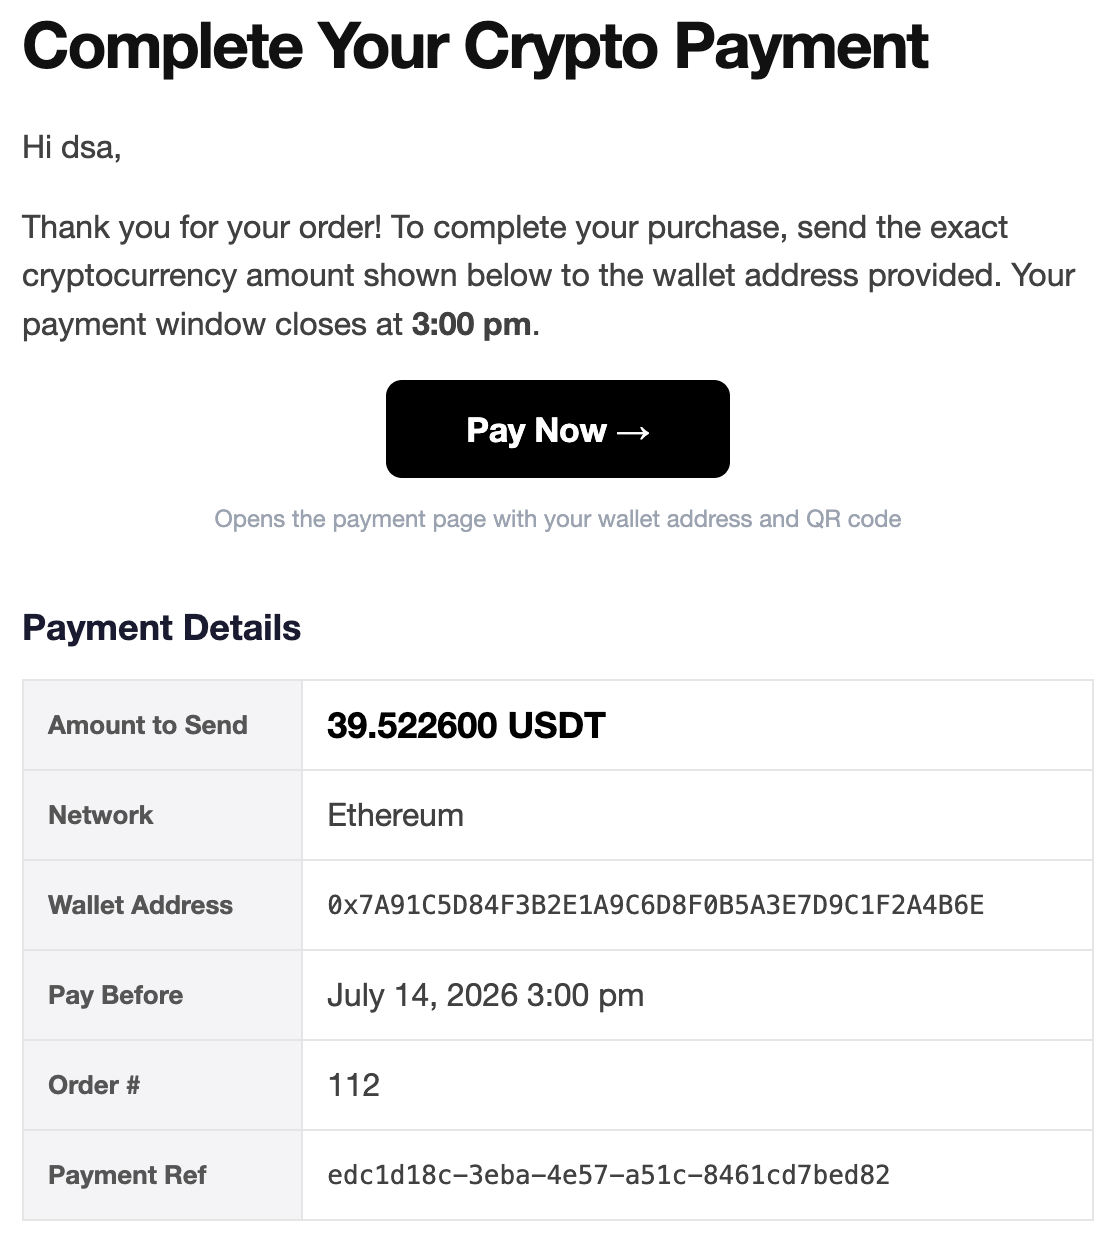
The email includes a prominent Pay Now → button that links directly to the payment page — no copy-pasting a URL from the body of the email.
Step 3 - Customer is on the payment page
The payment page shows everything the customer needs to send the payment:
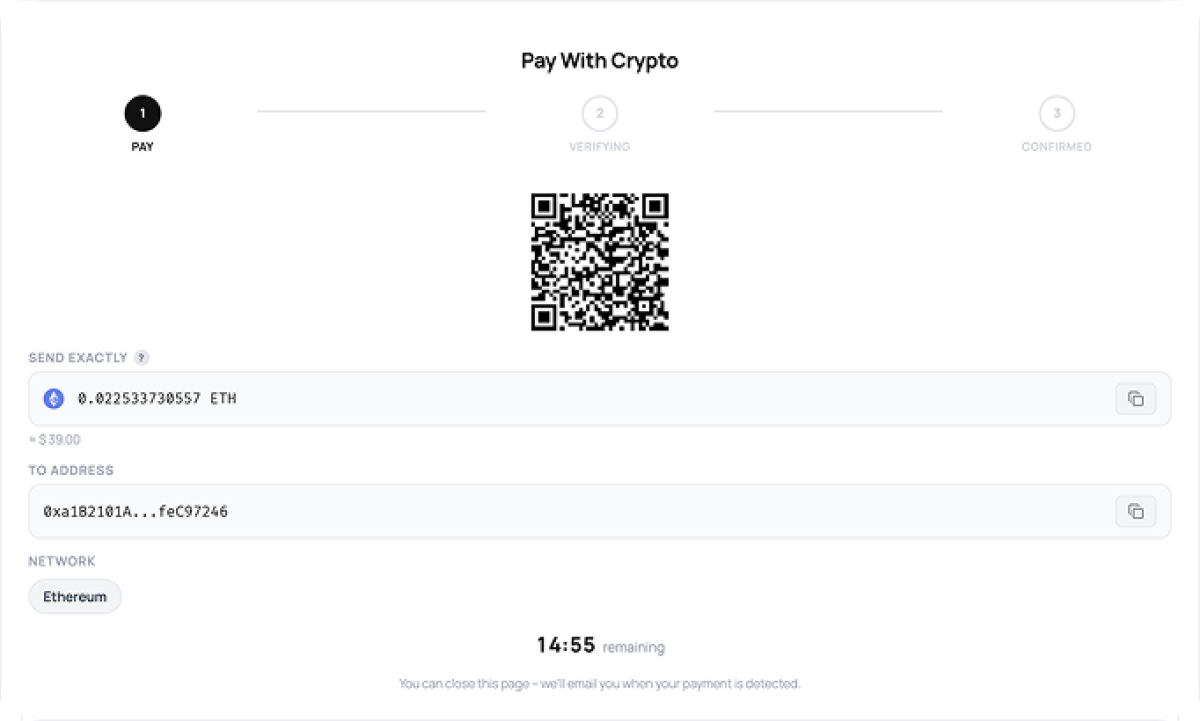
- A QR code for mobile wallet apps
- The exact wallet address with a one-click copy button
- The exact crypto amount with a copy button
- A countdown timer showing how long they have left
Most wallet apps can scan the QR code and pre-fill both the address and amount automatically.
Step 4 - AshePay detects the transaction
Every minute, WordPress's built-in cron runs AshePay's blockchain scanner. It checks your wallet address for incoming transactions that match the expected amount (within ±0.5% tolerance).
The moment a matching transaction is detected, three things happen:
- The payment page updates live — the customer sees a "Payment Detected" confirmation without refreshing
- The order status changes to reflect the detection
- The pending badge in your WordPress admin bar drops by one
Step 5 - Confirmations reached, order completes
AshePay waits for the configured number of on-chain confirmations. Once reached, the order automatically moves to Processing and your customer receives a confirmation email.
The funds are already in your wallet at this point. There is nothing to withdraw or claim — the blockchain sent them directly to your address the moment the customer's transaction was broadcast.
What if the cron does not run? AshePay monitors its own cron health. If WP-Cron has not run in over 5 minutes, a notice appears in your admin dashboard so you can investigate. On very low-traffic sites, WP-Cron only fires when someone visits the site — see the Troubleshooting guide for how to set up a reliable cron if needed.